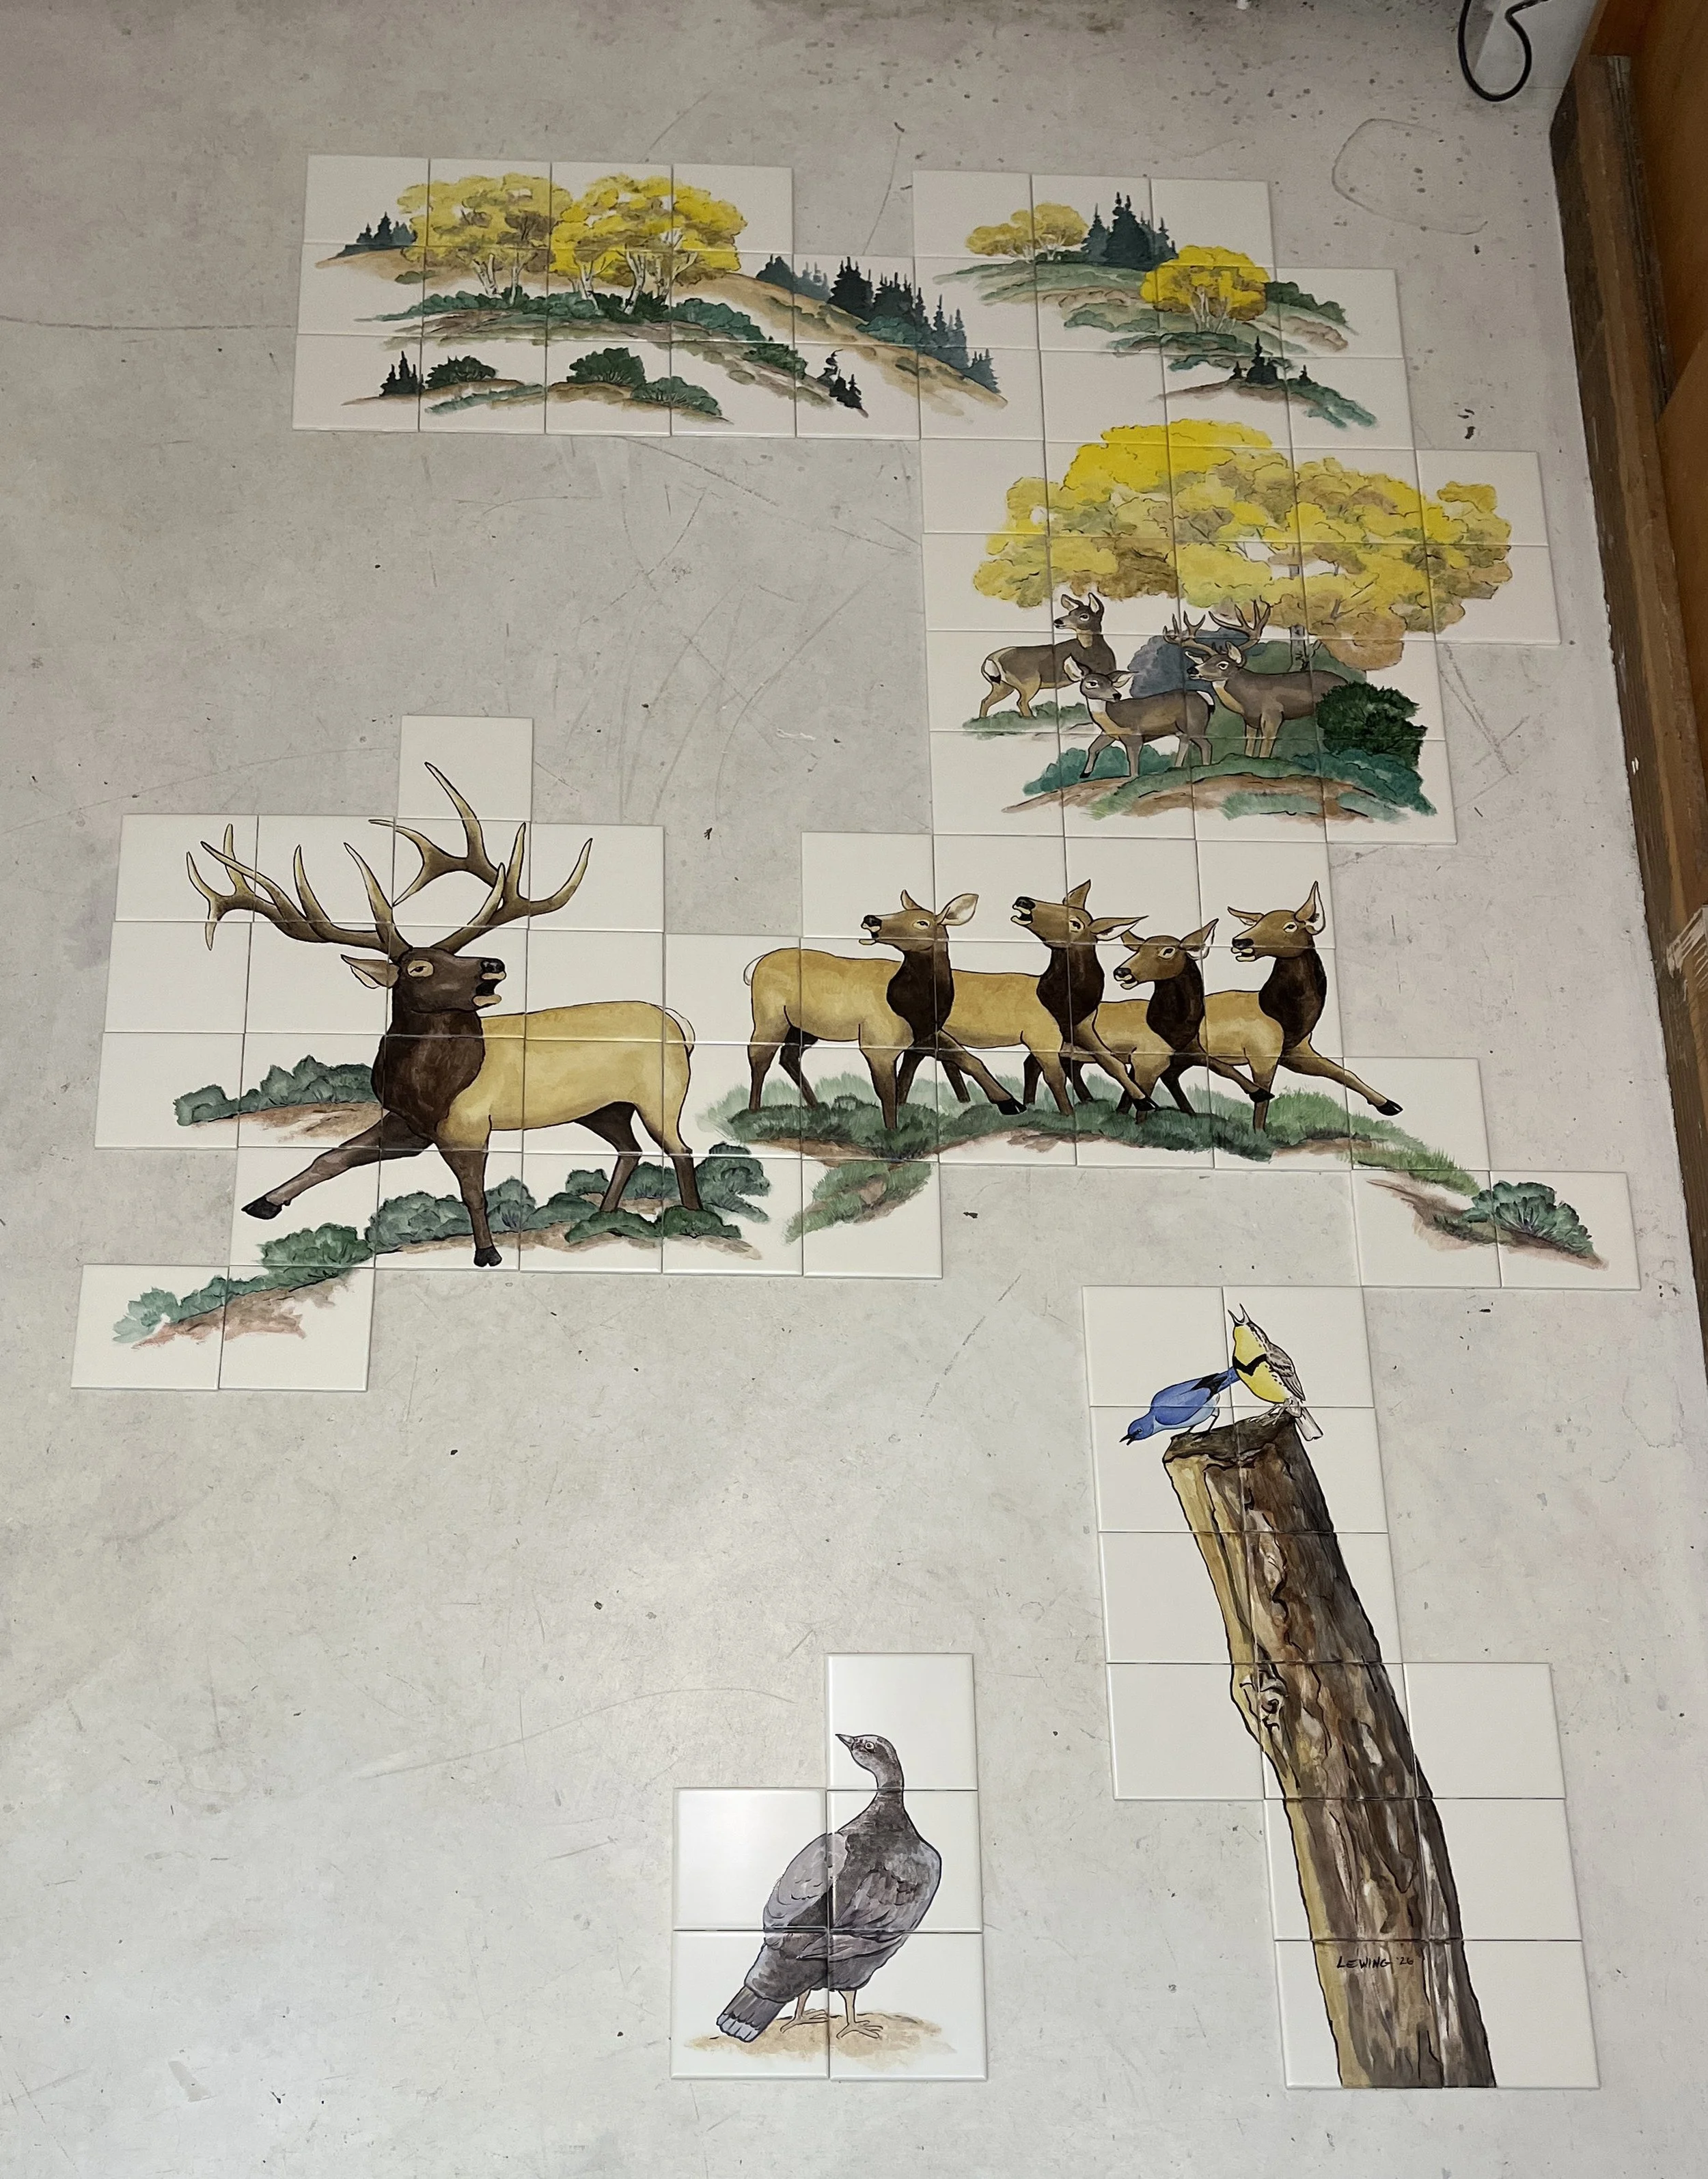
Last of the MT Animals
Here is the tile for the fourth and final wall of the bathroom custom tile mural that I’ve been working on with the Whimsical Montana Animals. This one features the “chorus line” of elk and the mule deer listening in. It’s been quite a project. Now comes the adventure of packing it and shipping it off to Montana.
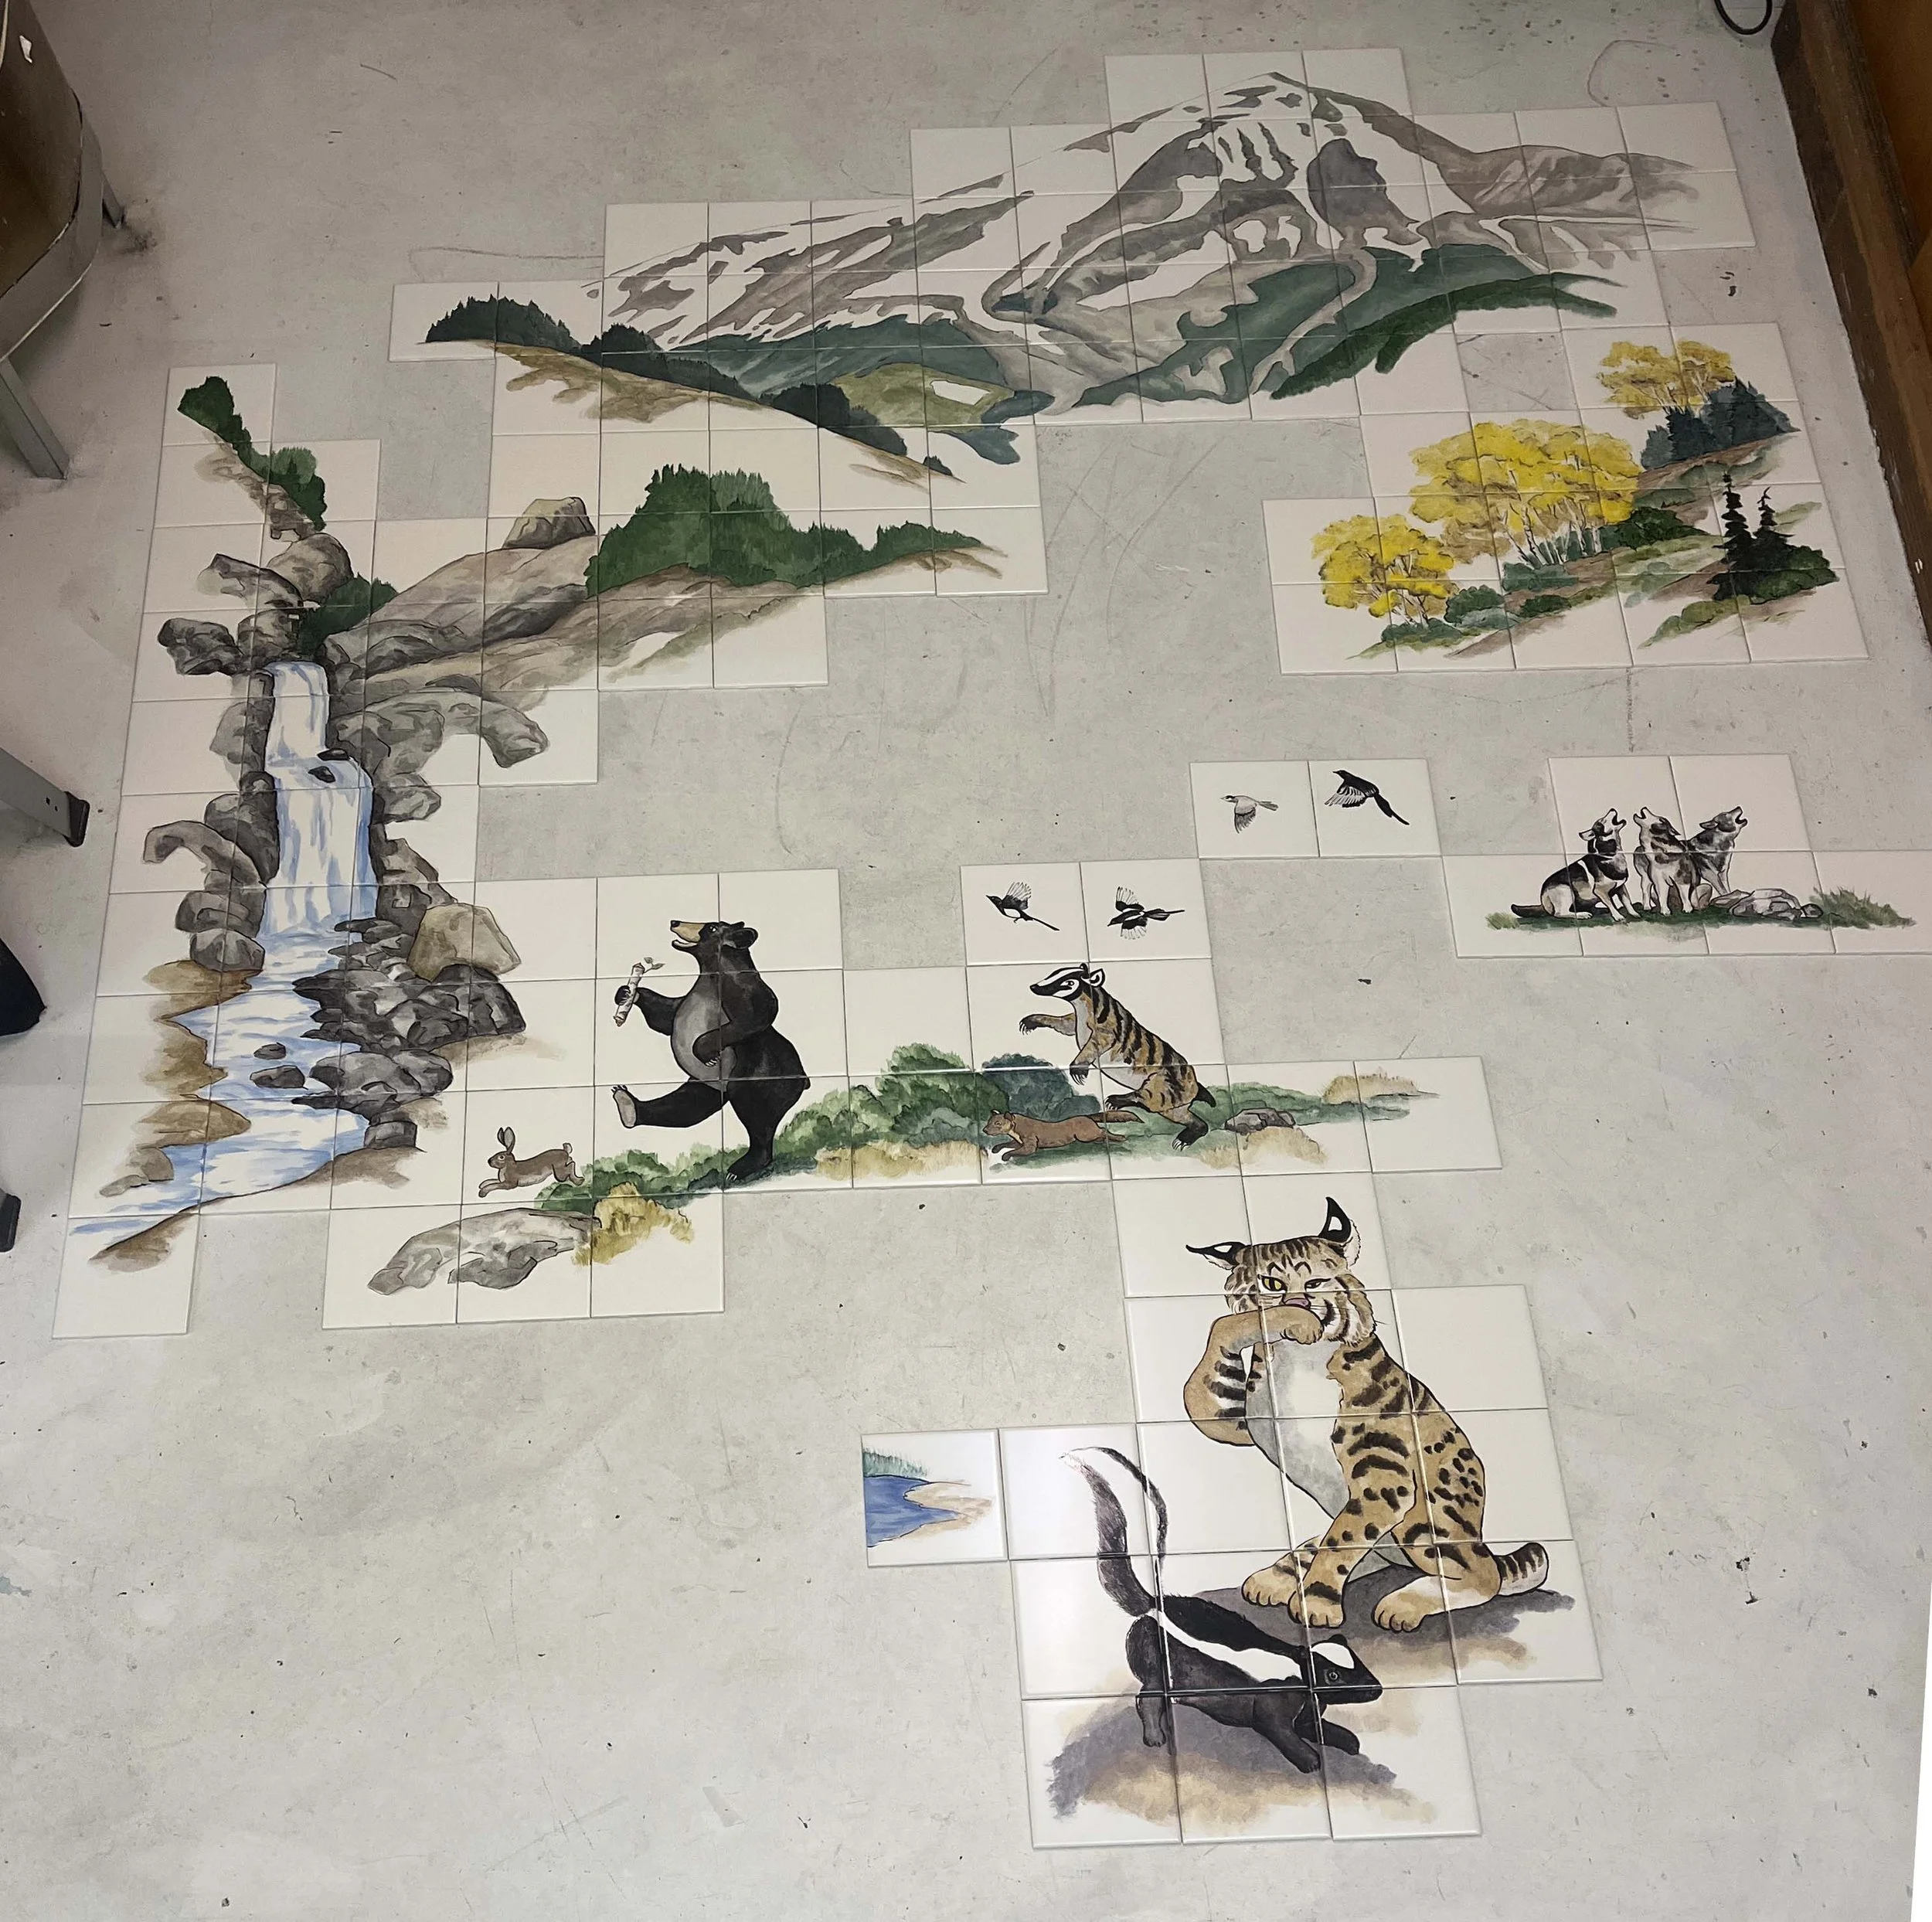
More Montana Animals
Moving along with the bathroom custom tile mural in Montana. This is the third of four walls. The theme here is “Whimsical Montana Animals”, so we have the bear leading a parade, with a chorus of wolves, and since it’s going over by Bozeman, a bobcat. There’s a tiny bit of the beaver pond peeking around the corner from the tub front on the last wall. The shape to the right of the bobcat is the toilet. One more wall to go.
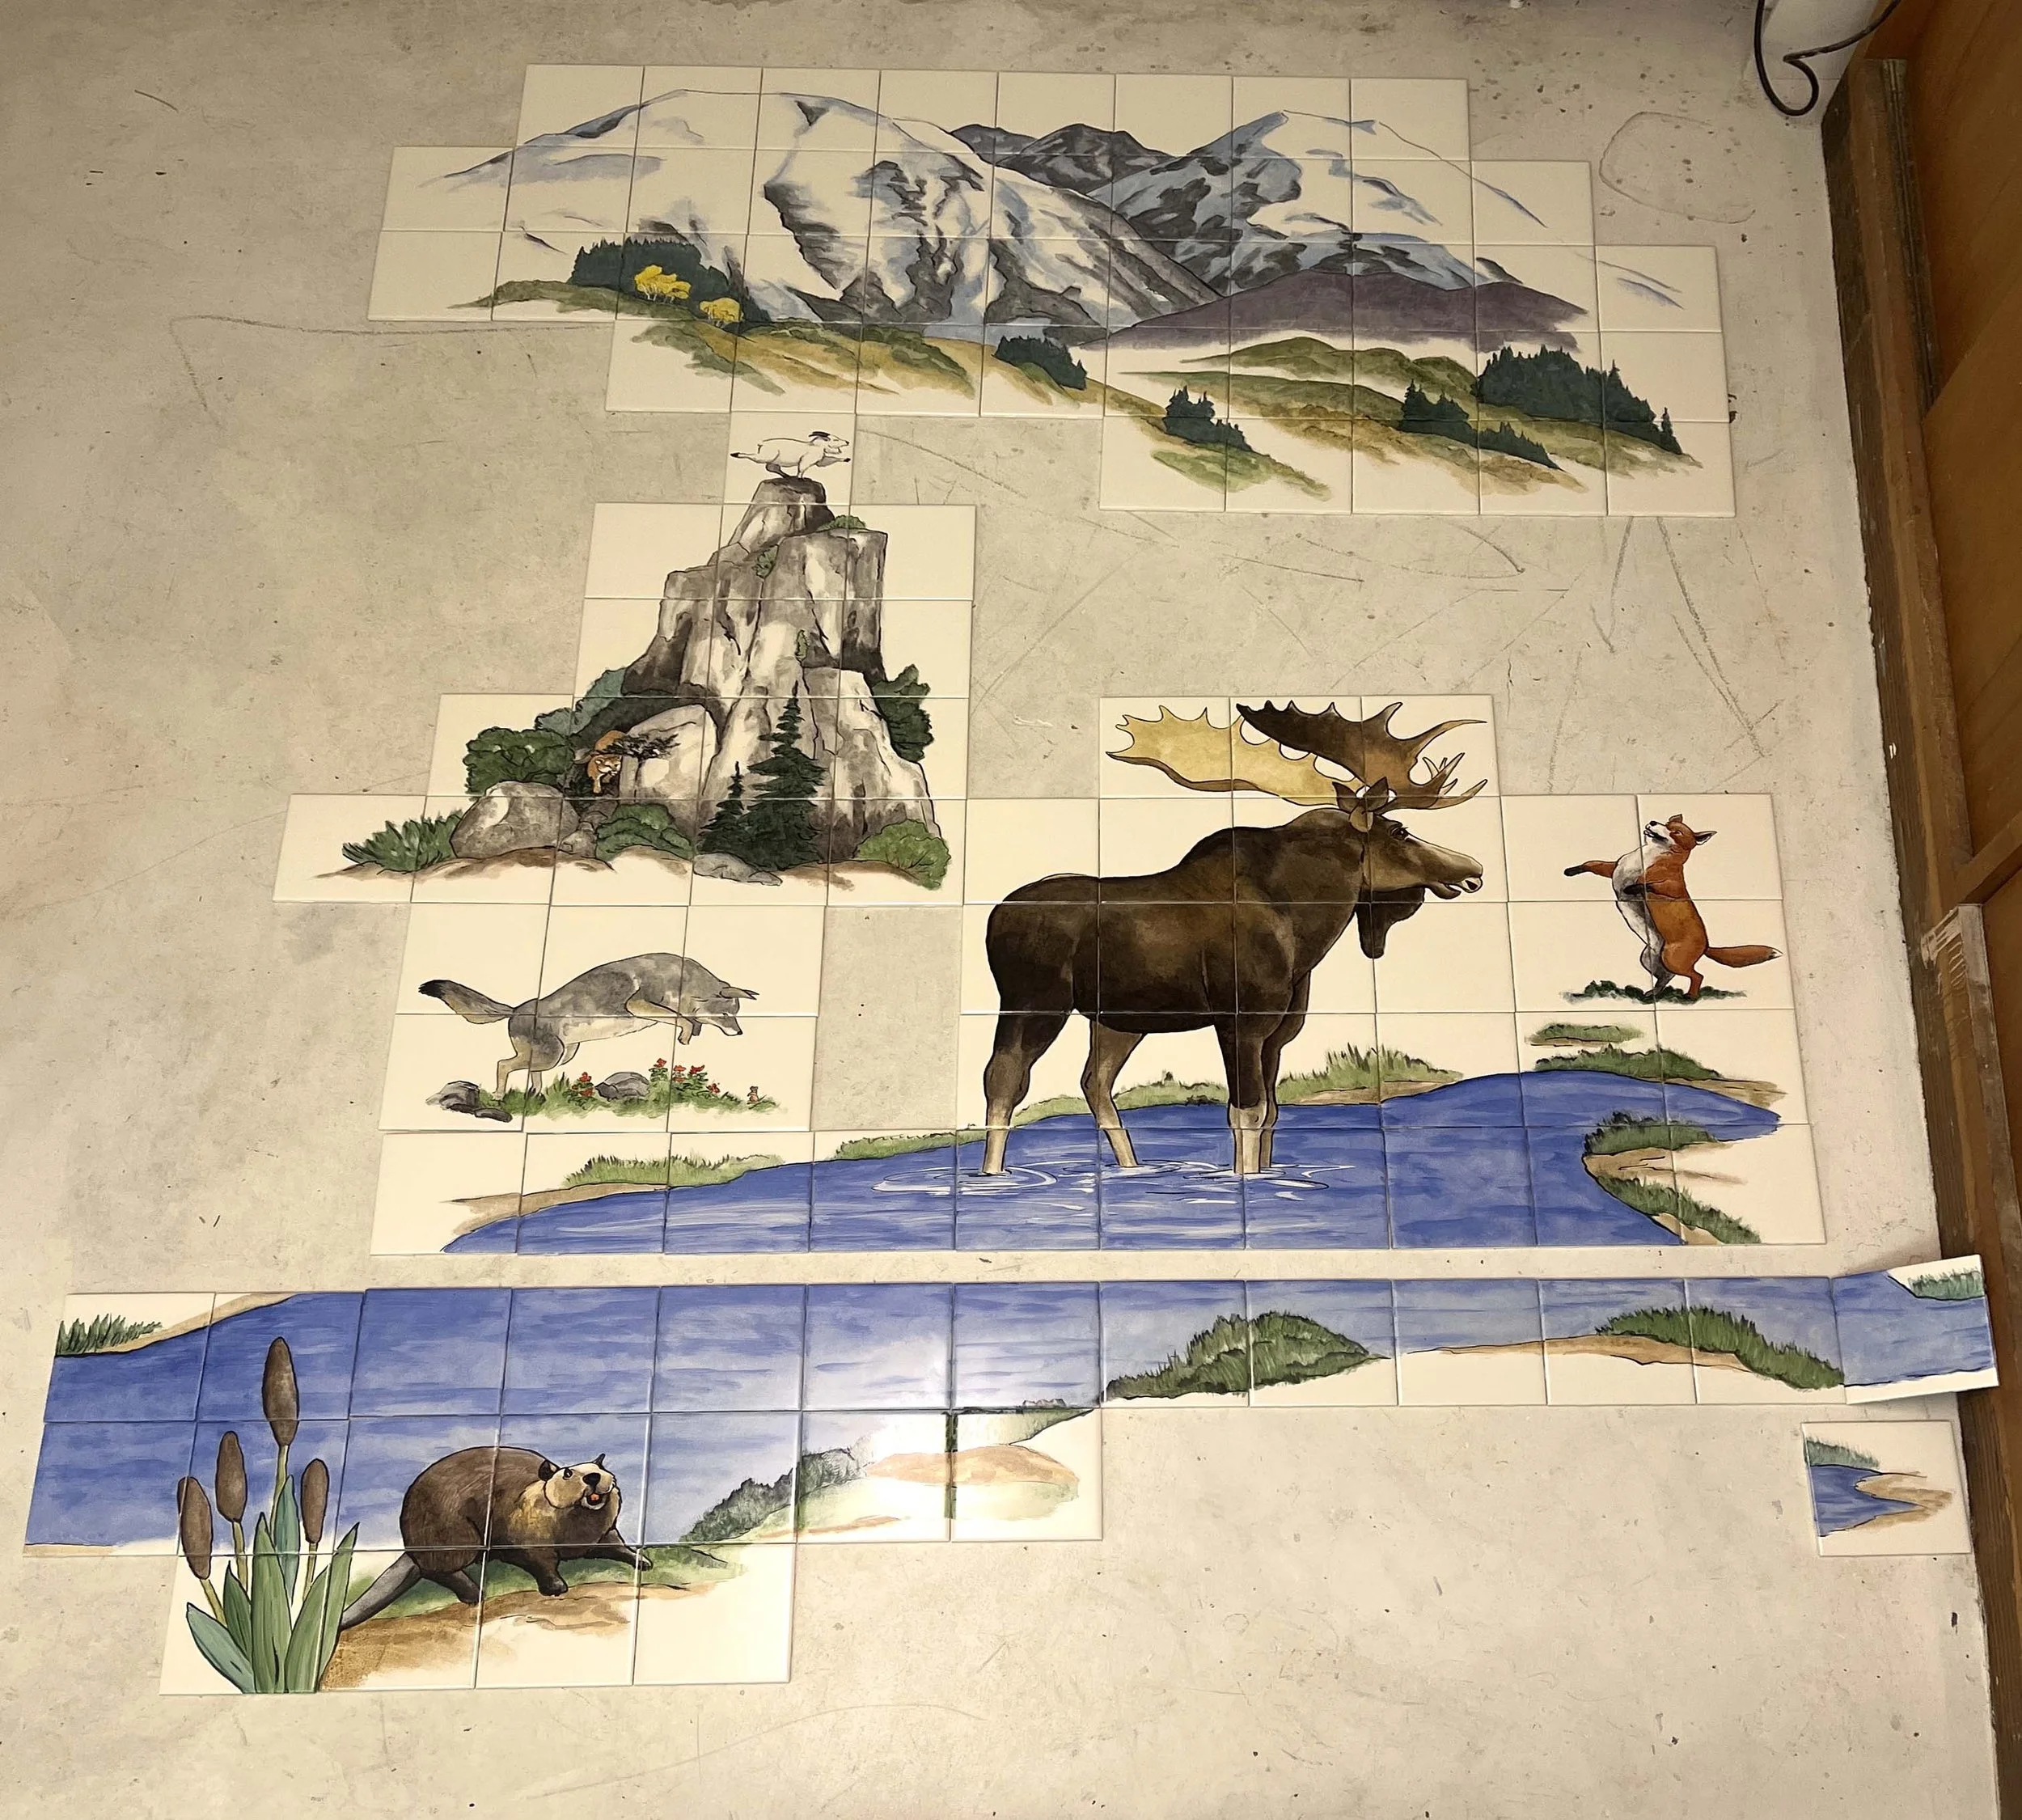
Montana Animals Again
This is the tile for the second wall of four for the kids’ b bathroom in Montana. Their only guidance was “whimsical Montana animals”. So here we have the goat doing yoga and the dancing fox and a hidden cougar. There will be a lot of blank tile interspersed with these areas of painted tile. The blank line in the blue area represents the break for the tub. Above the line will be on the wall, below the line will be on the front of the tub .
A Prize!
I had this painting “Cardoon” (36” x 24”) accepted into the 36 x Fixed by Dimension juried show at Graphite Arts Center, in Edmonds, WA. When I went to the opening last night, I was surprised and delighted to find out that I had won Honorable Mention! Every piece in the show is 36” in at least one dimension. I called it “Yard Art” Really bad pun.
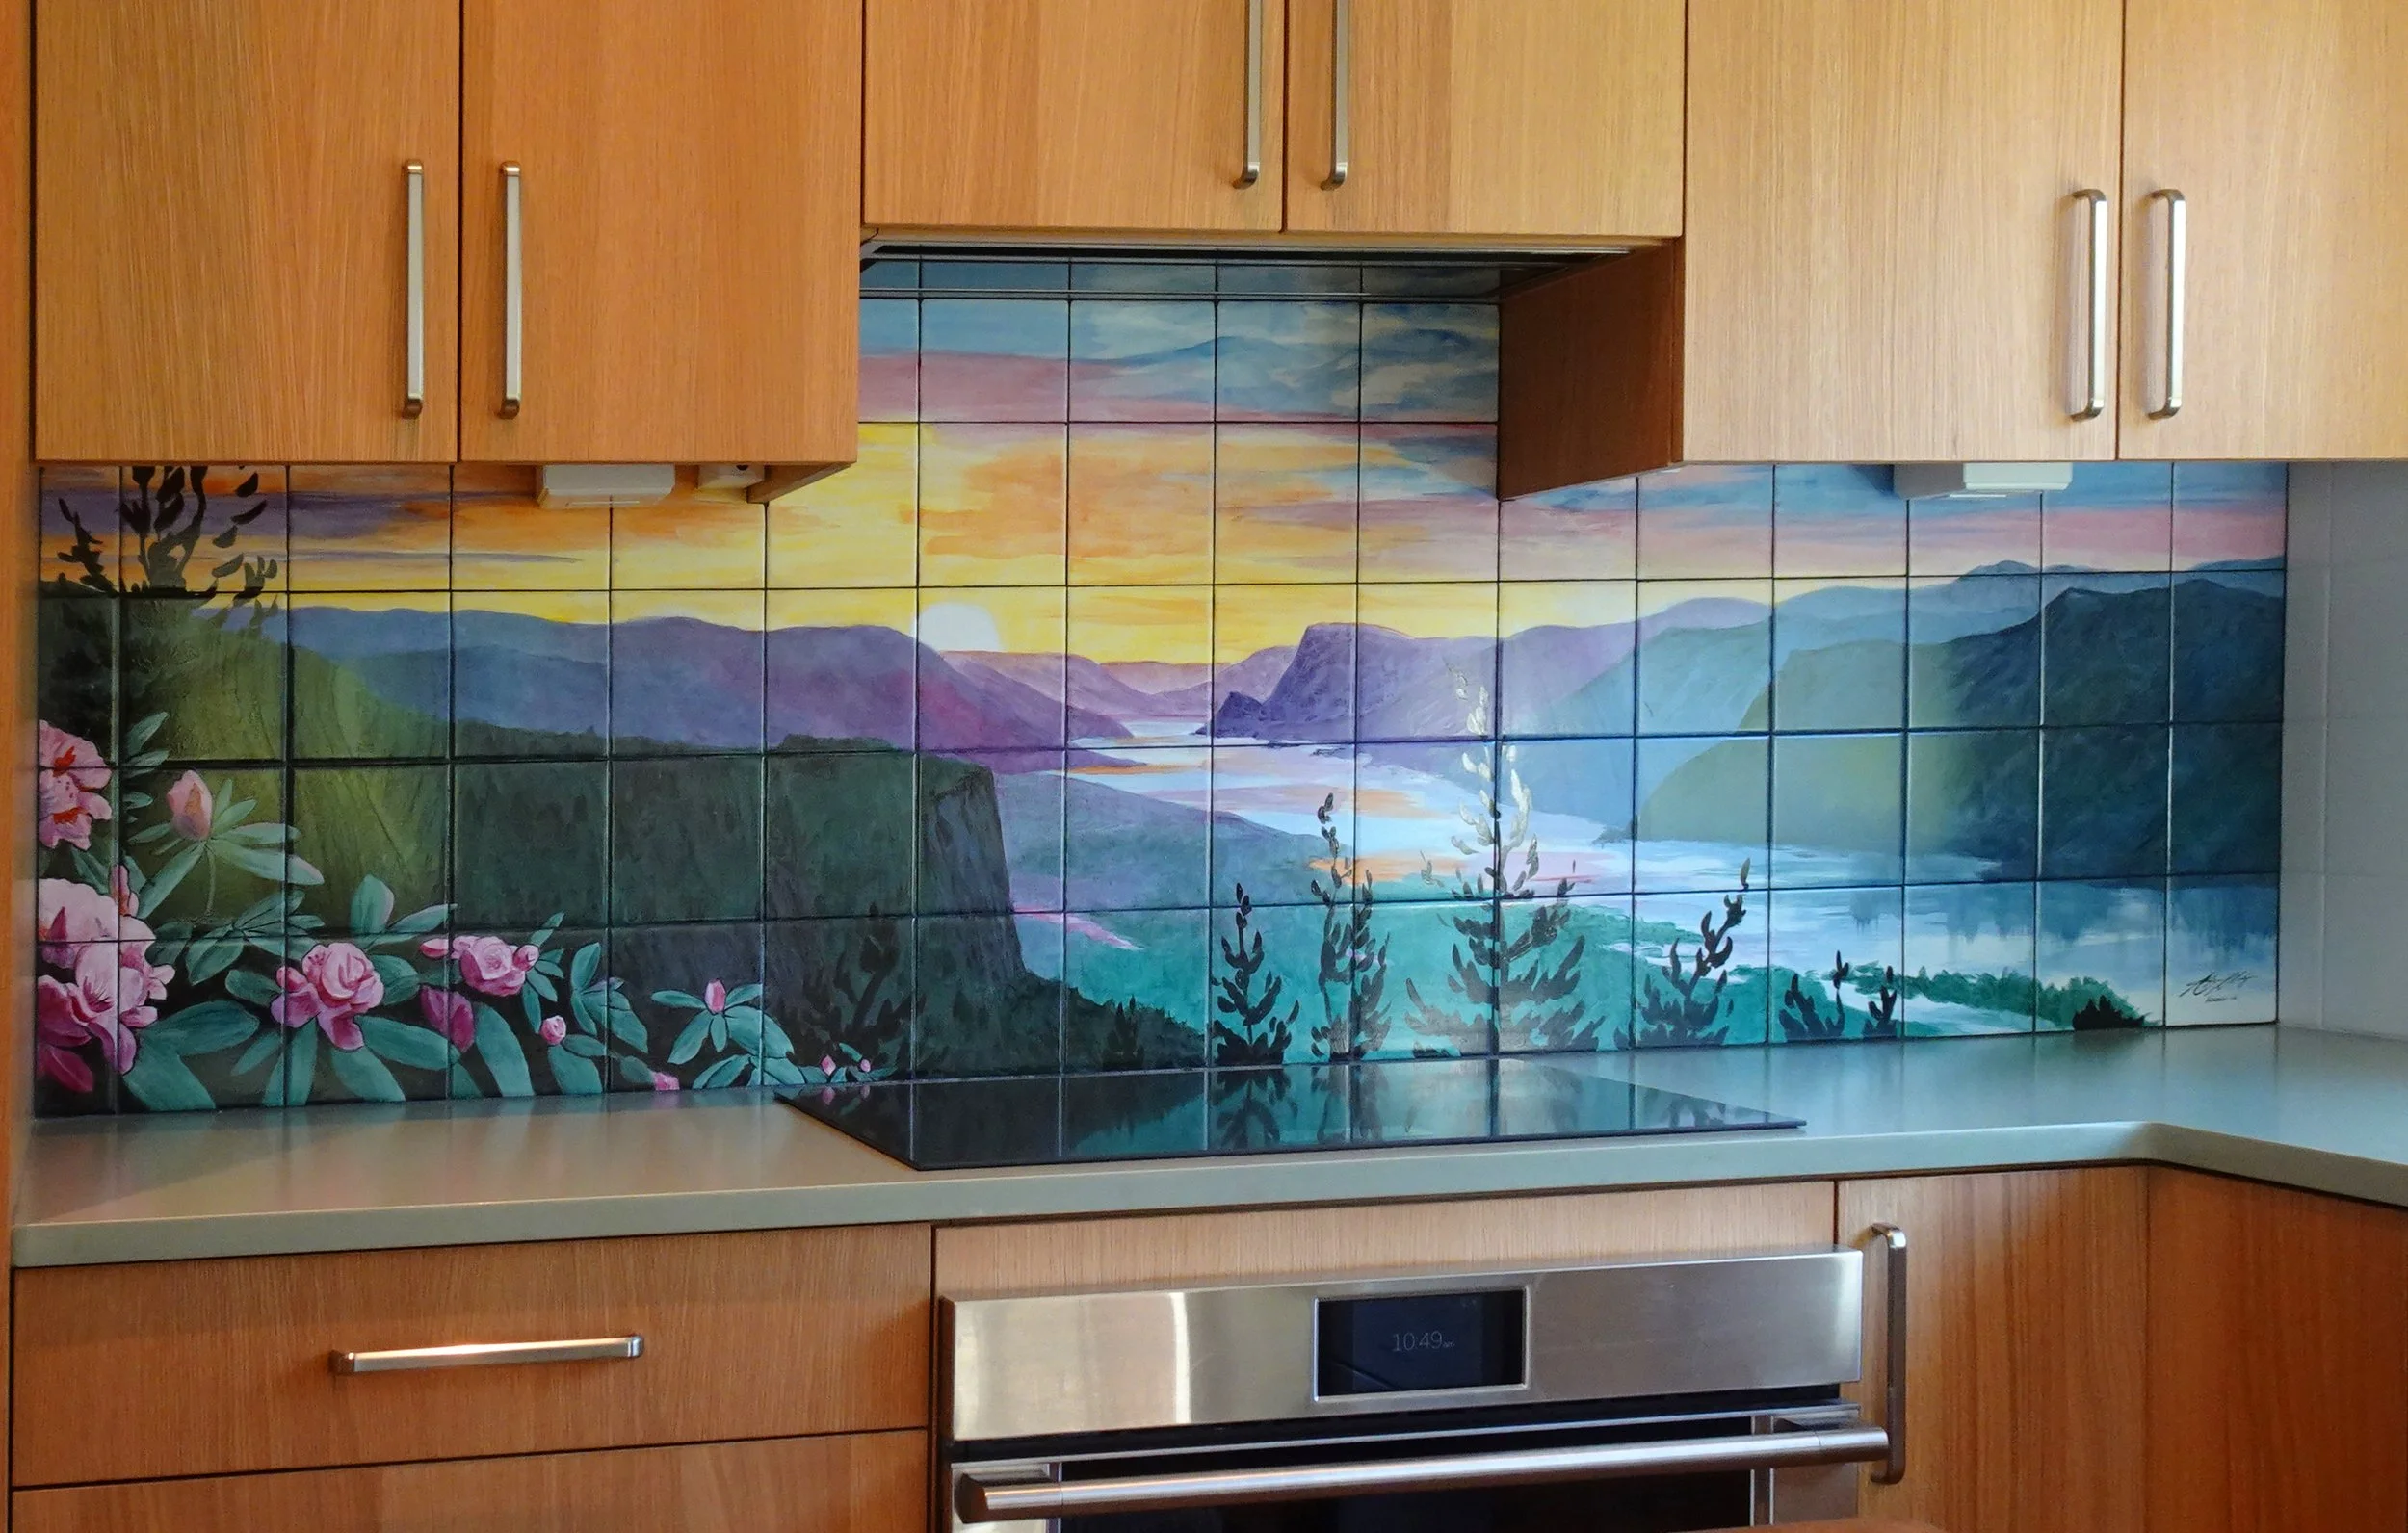
Columbia Gorge
I’ll paint anything anybody wants on tile. Usually that means clients come to me with a description of what they want and I design it for them. But sometimes they’re more specific than that. Here’s a case where the client wanted his young neighbor to design his kitchen backsplash mural. They consulted with me on layout, and he did a number of revisions on his computer, but this (more or less) realistic depiction of the Columbia River Gorge is his. I just duplicated it as closely as I could.
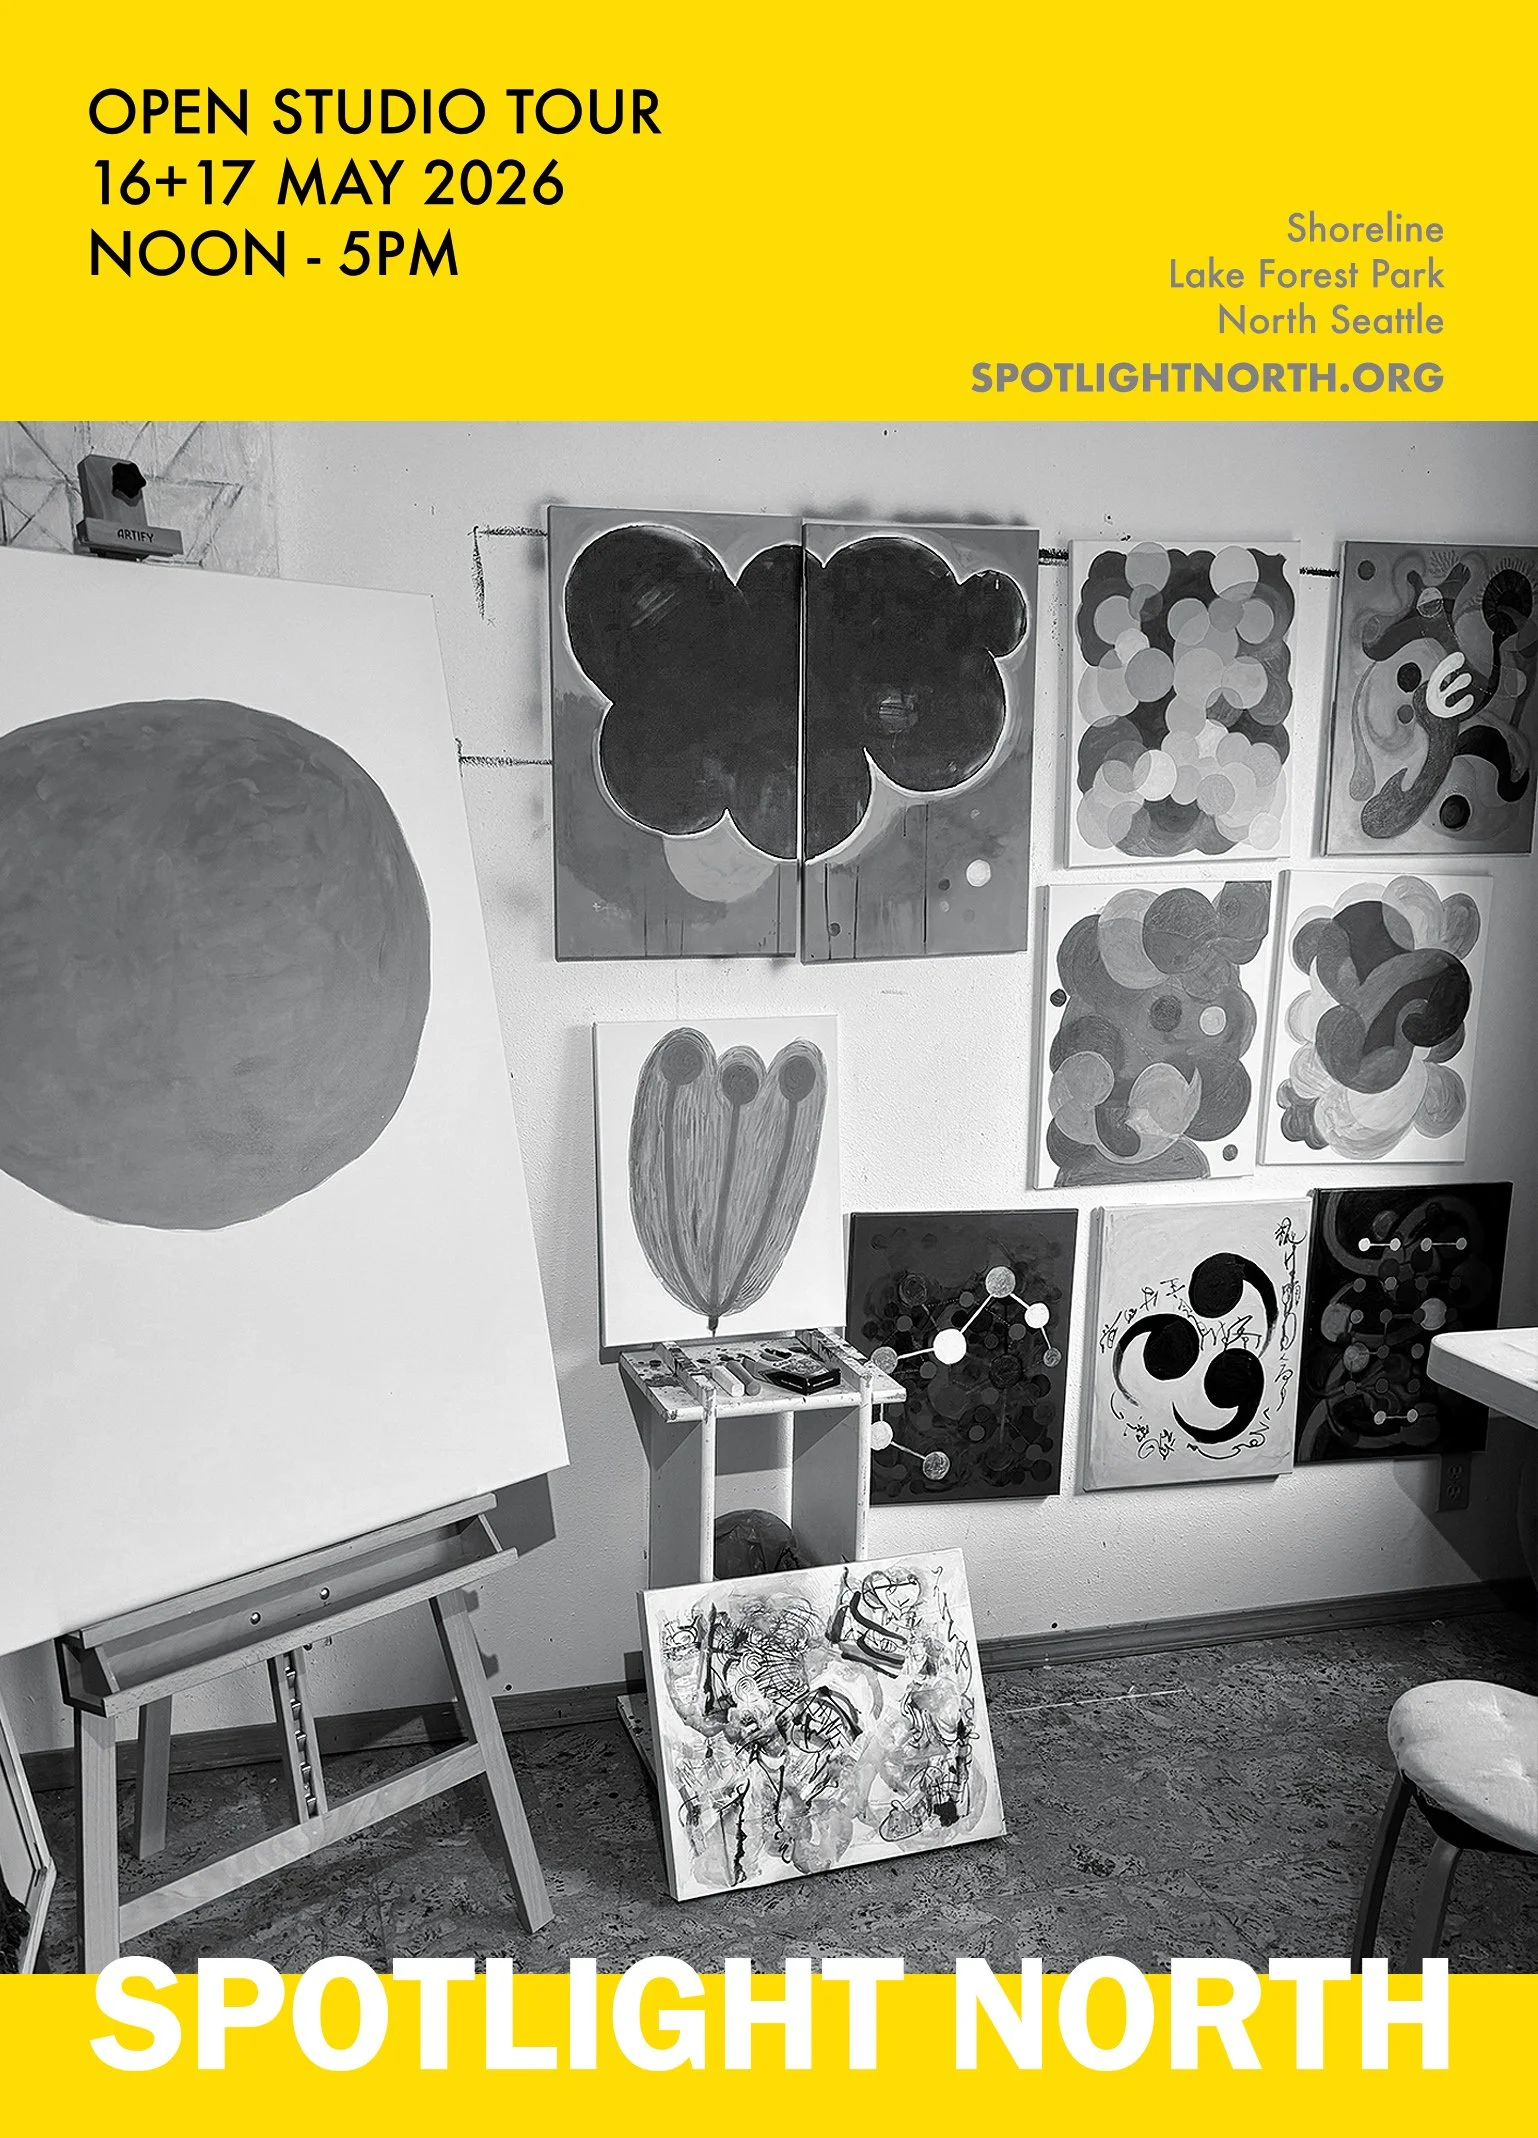
Spotlight North Studio Tour
Once again this year, I’ll be part of the Spotlight North Studio Tour. This tour is artists studios in Shoreline, Lake Forest Park, and North Seattle. It’s May 16 and 17. The official tour hours are noon to 5, but I’ll be open by 10. Come on by.
The Beginning and the End
This is how a custom tile mural starts and how it comes out. The client gives me the measurements of the space, and any images or descriptions they can round up to tell me what they want it to look like. I then make them a scale drawing so we can see how it fits into the space. In this case, I needed to work around an outlet. This lady came from a family of Northwest fishermen, so there’s lots of seafood in it, and she wanted it fun and whimsical. She gave me some pictures and I used my very extensive library of images on all kinds of subjects. Then I fire it onto the tile we select, and she’s happy.
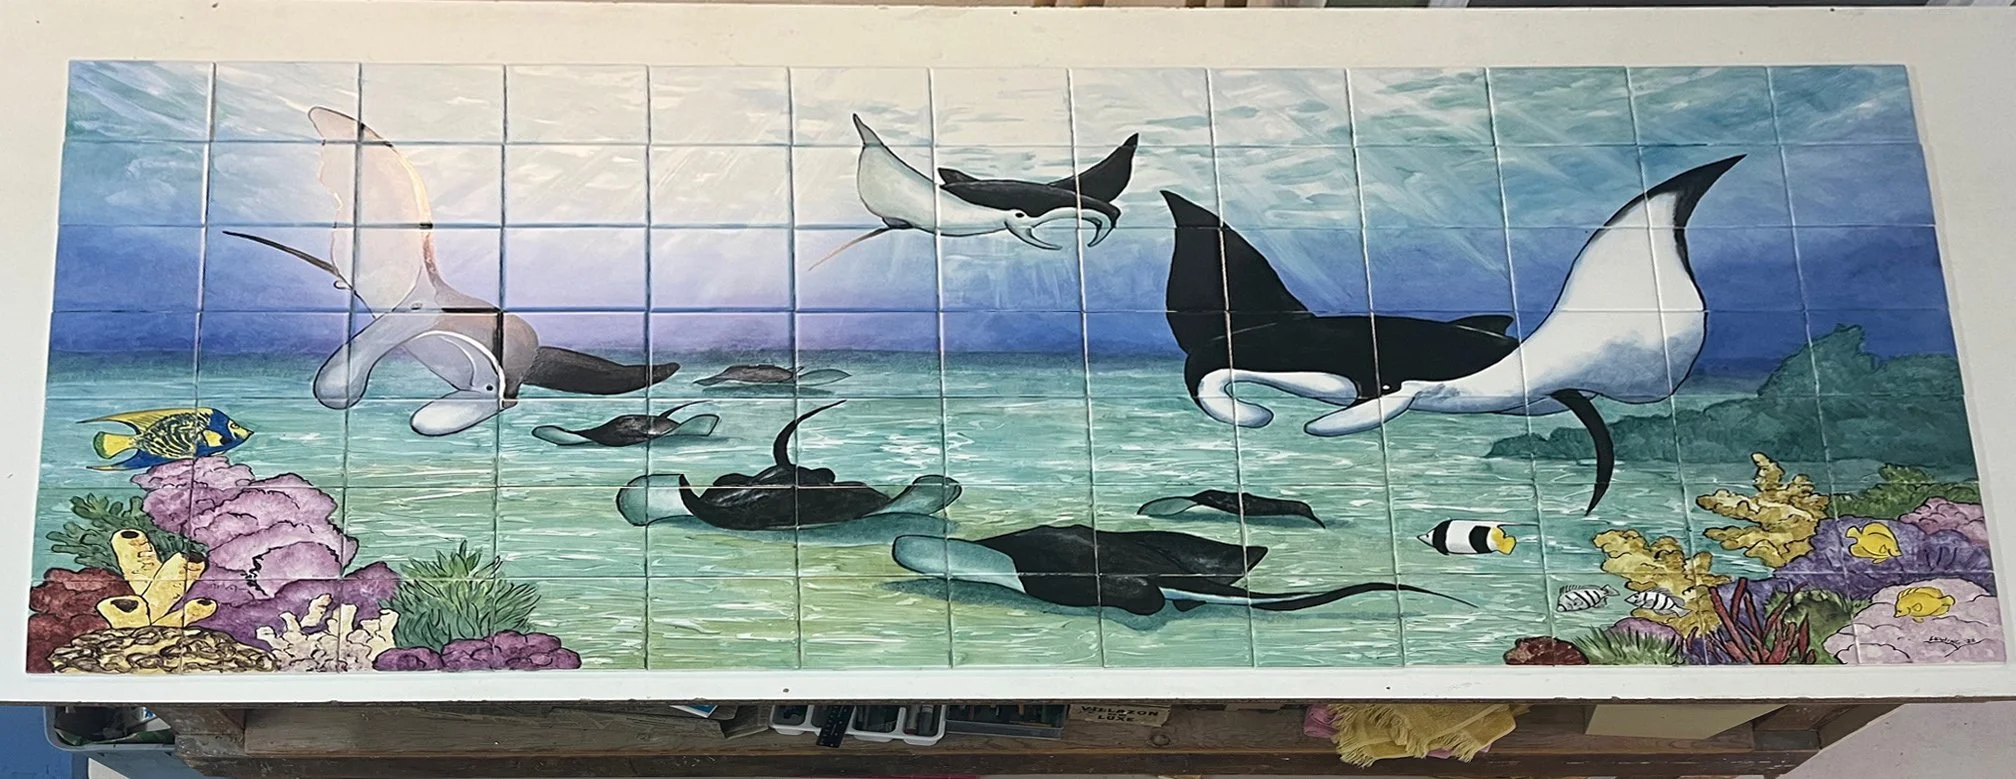
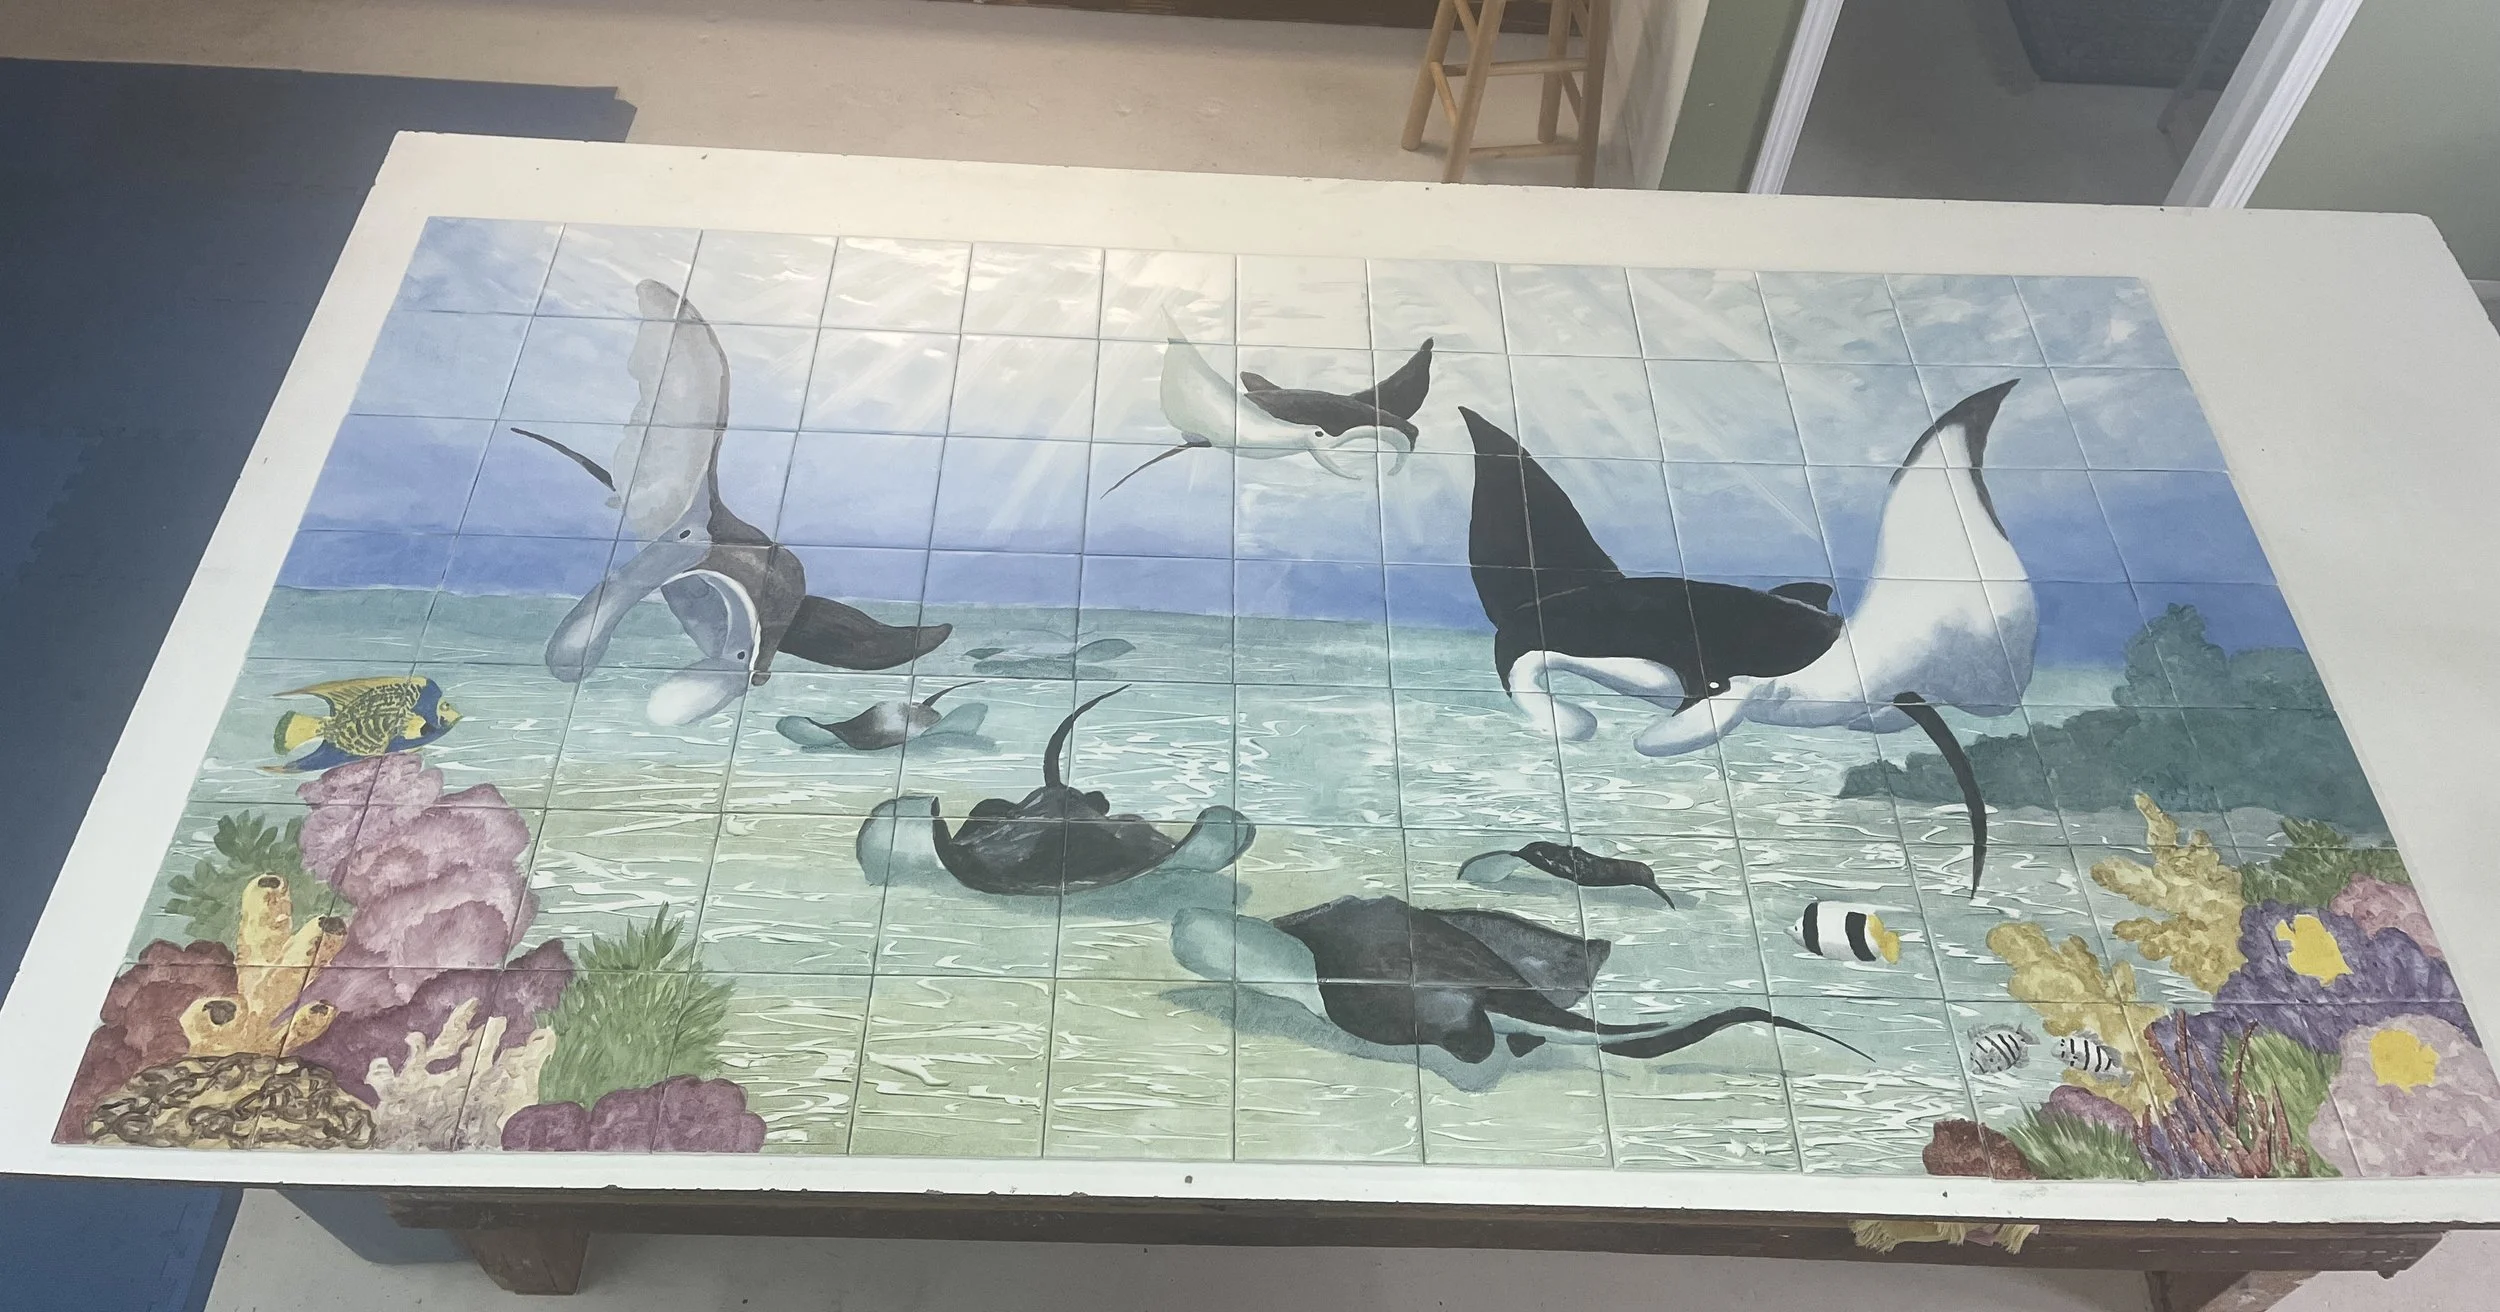
Mantas Done
Here’s what the Mantas handpainted tile mural looked like laying on the table in my studio before it got shipped off to Florida. It’s 6’ 6” wide and 3’ 6” high and will go over a counter in a kitchen. I particularly like how the light coming through the water and the light patterns on the sand came out. I just wish I didn’t always have that big glare spot from the overhead lights, but there’s no other place to lay this out. I’ve been posting pictures of this piece in progress over several weeks, but in reality it didn’t take that long. The tiles have already been delivered to their new home.
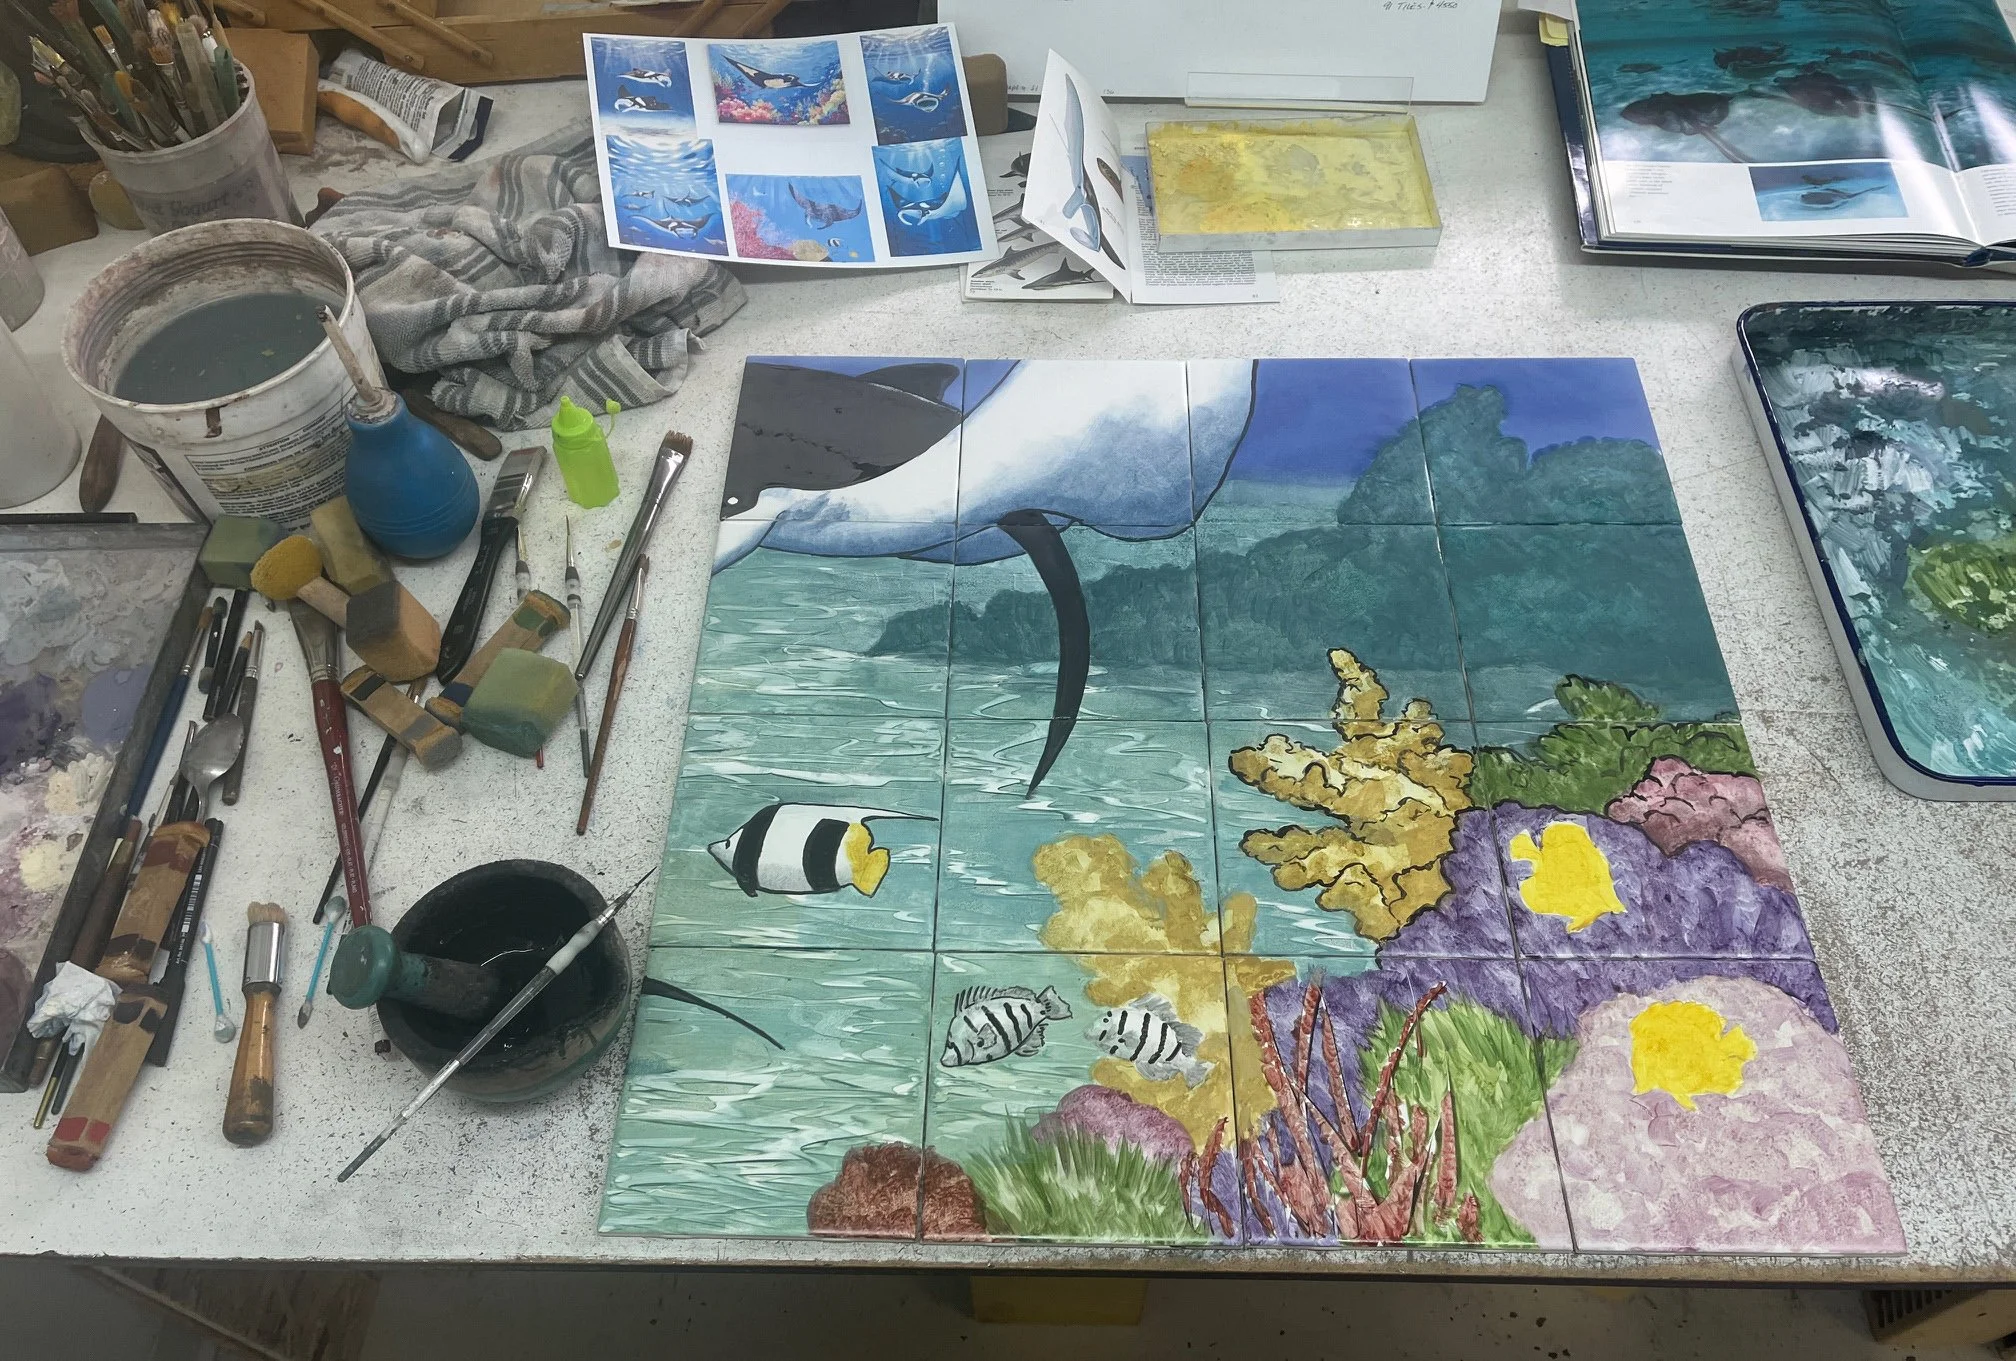
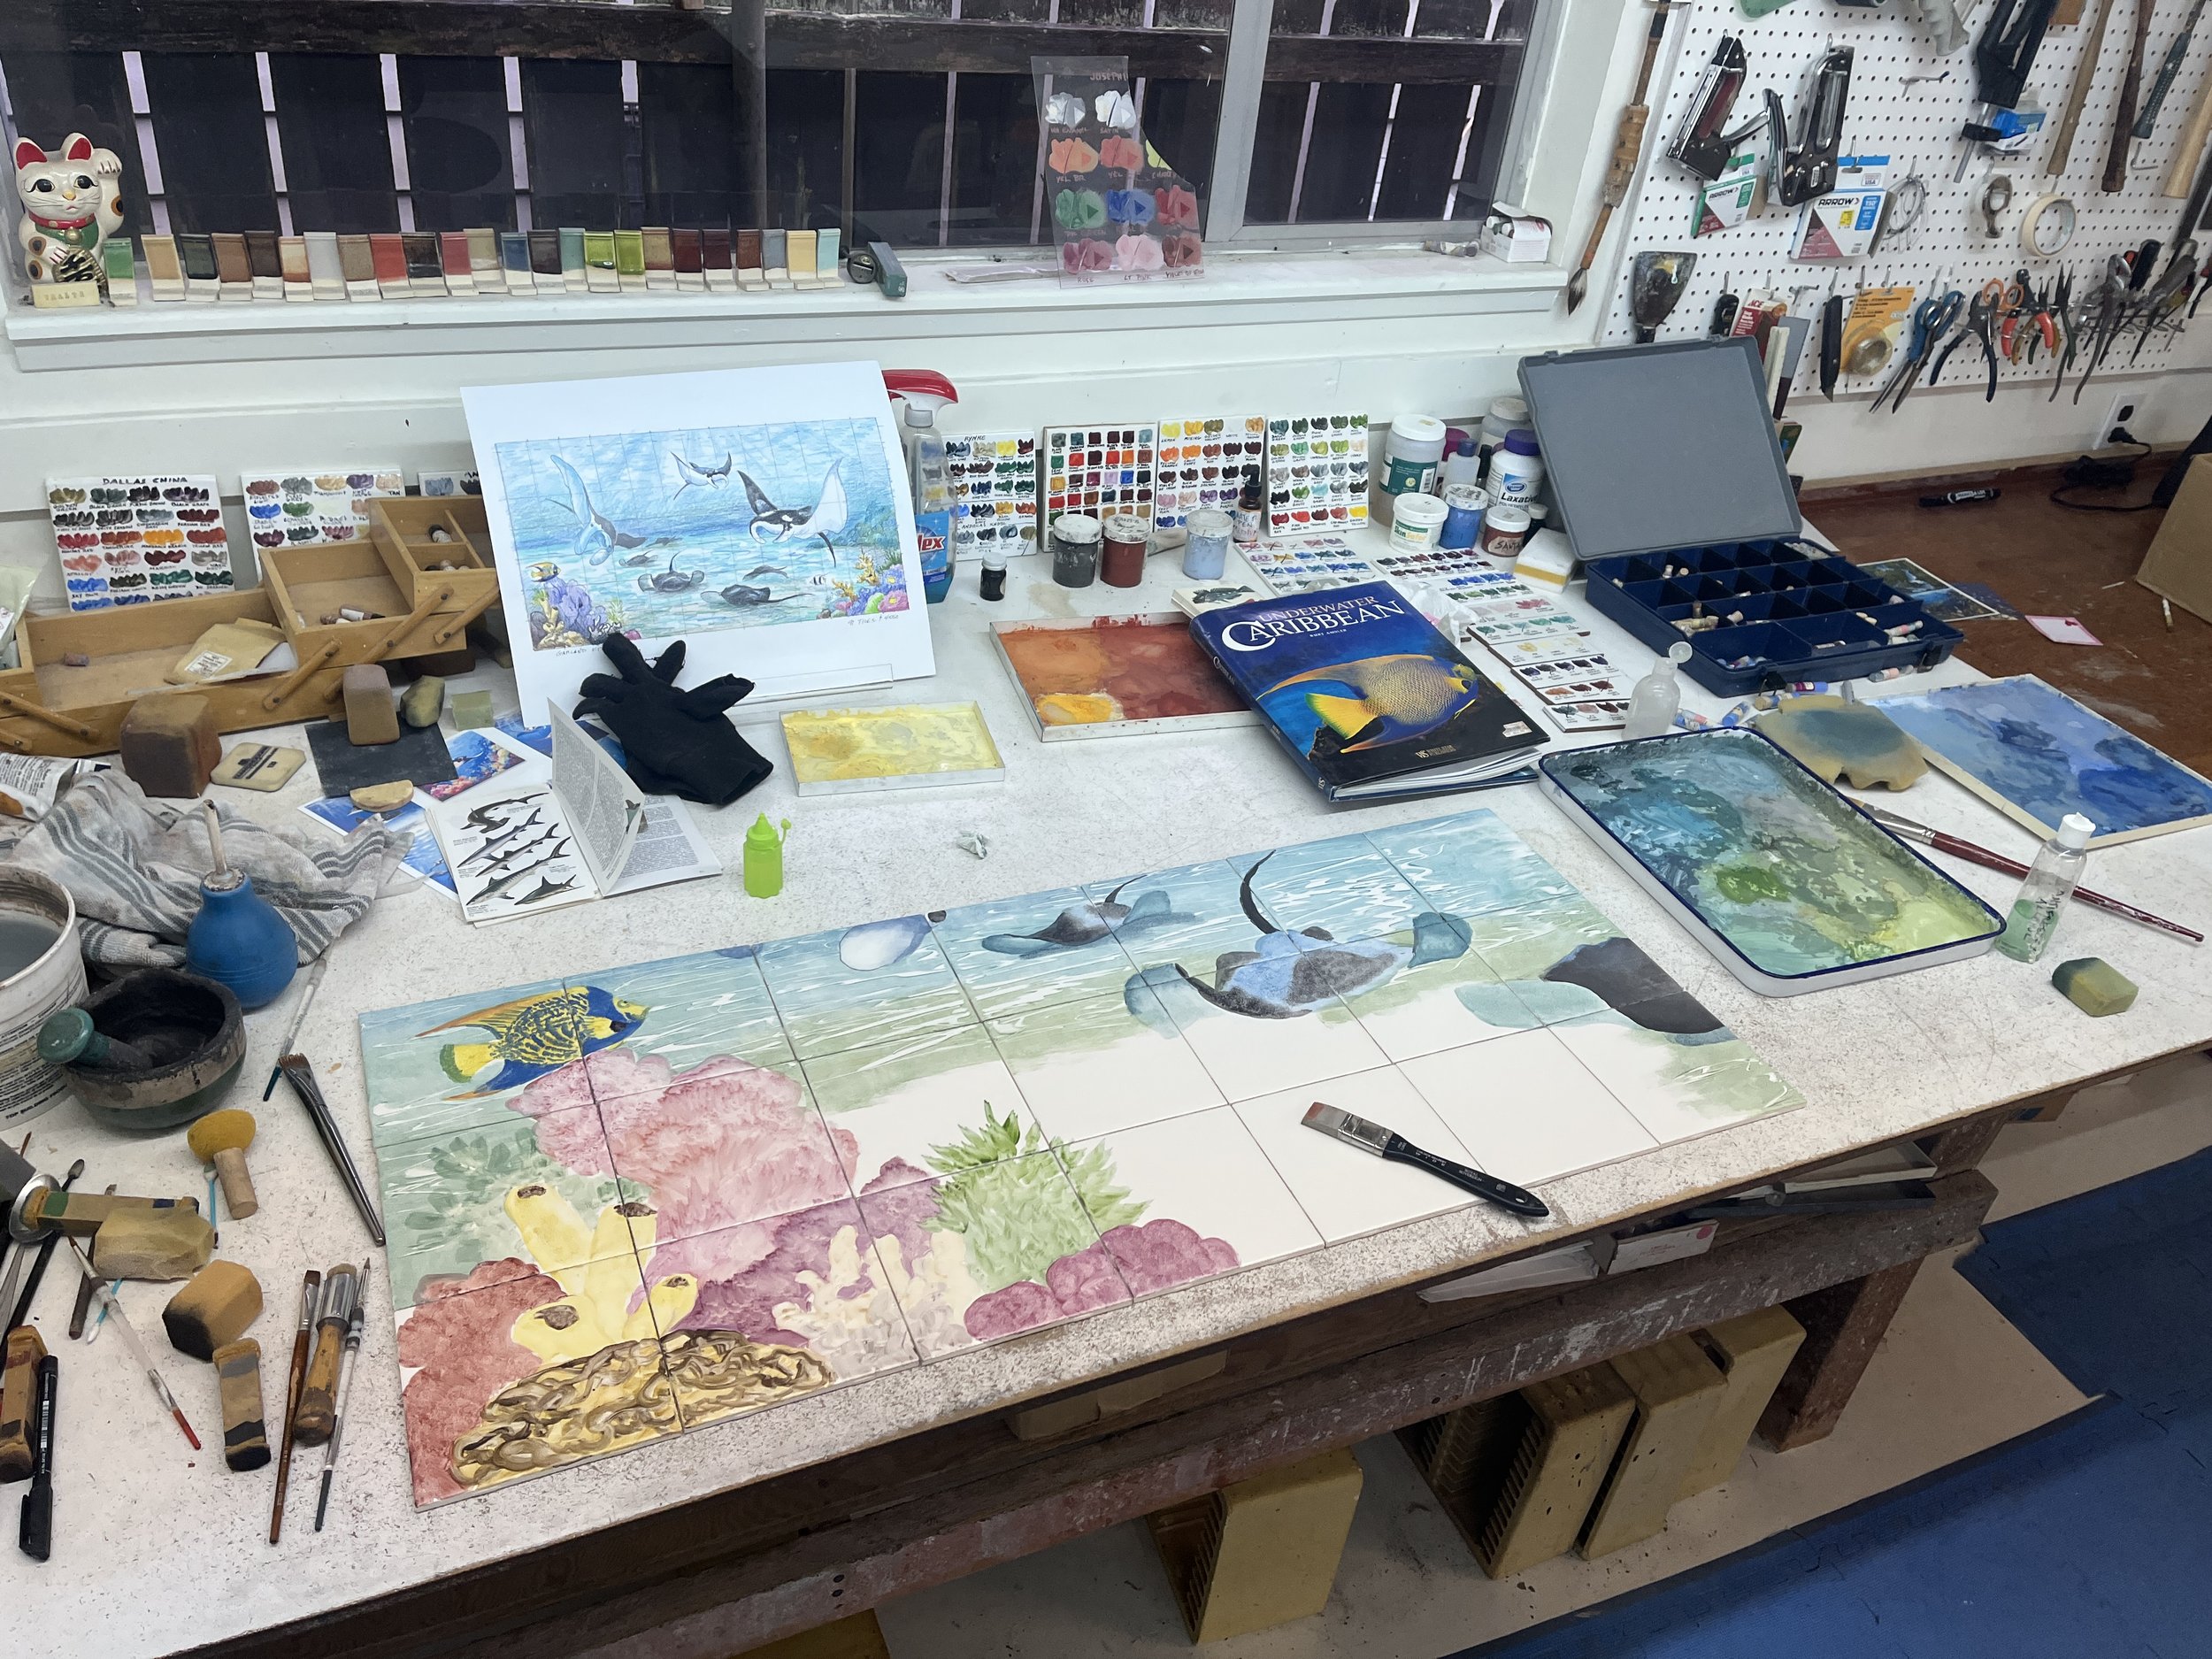
Mantas: Third Steps
Working on the third and, I hope, final firing. This firing is mostly adding black outlines, but I also do some more intensifying colors, like I’ve done on the yellow-brown coral that has the outlines on it. I’ll do that on the other one too. Most china painters don’t do this outlining, but I work much larger than traditional china painters, and these images need to carry across a room, so they need to be punchy. Also, doing several coats and pouncing the colors to remove brush marks, the edges of things get fuzzy. This gets them crisp again. I keep the black in the mortar and pestle and grind it periodically to keep it in suspension. I just let it dry out in between jobs.
Mantas Second Firing
Here’s what the Mantas bespoke tile mural looks like after the second firing. You can see that the background is now filled in, the colors have been deepened and texture has been added. There will be at least one more firing. The next one will be black outlines, and deepening colors even more. I’m liking it so far. I particularly like the way the sunlight beams through the water and plays on the sand.